

Remarks
X-Plane requires several advanced steps to achieve read and write data to it via network connection without any extra add-on installed. You must follow the steps listed here to get it to work. Please note that X-Plane sends less data than other simulators, so some instrument readings may not be available. In the Android app, always select the version of X-Plane you are using.
Setting the network addresses
1. Check the Android device “IP : Port” below the WAITING alert.
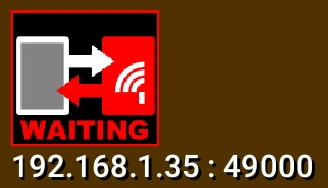
In this example the IP Address is 192.168.1.35 and local port 49000, these values indicate the network address of the device and they will have to be placed in X-Plane´s Network Configuration so that the simulator knows where to send the data. Depend on your network configuration the address can be changed any time you reconnect your device to WiFi.
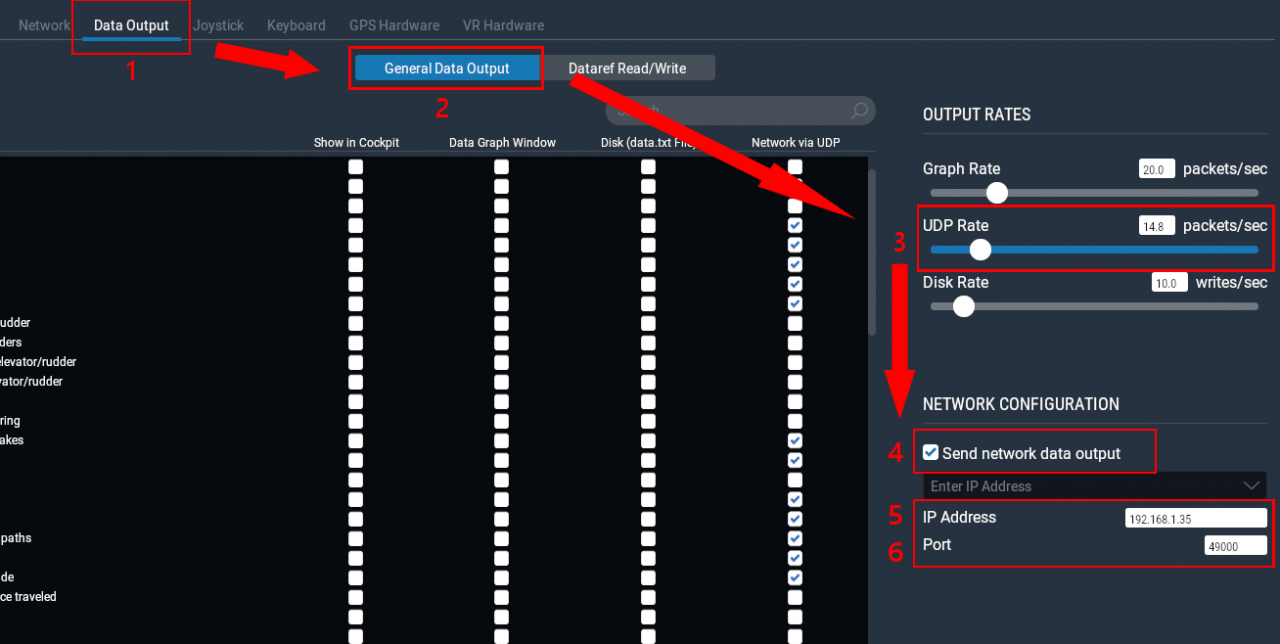
2. Tell X-Plane where to send the data:
Go to X-Plane Settings.
(1) Select Data Output tab.
(2) General Data Output.
(3) Set UDP Rate to max 15.0 packets/sec. Please avoid a higher rate.
(4) Tick the check “Send network data output”.
(5) Put the IP Address of the Device.
(6) Put the Port of the Device.
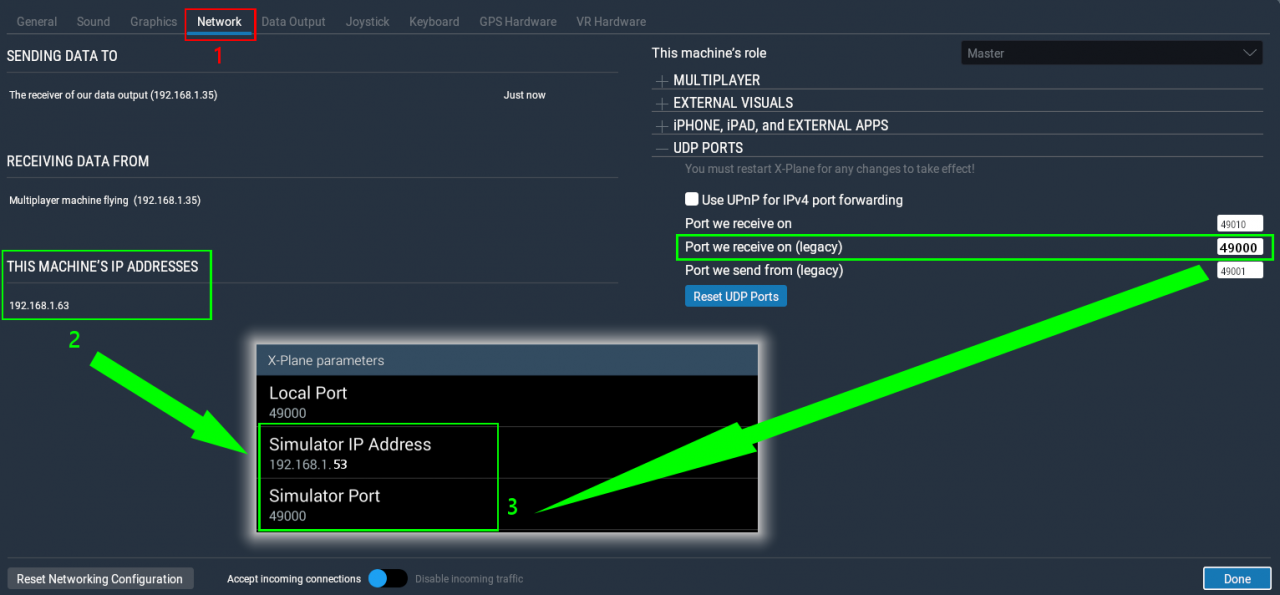
3. Tell the App where to send the data.
(1) Select Network tab and expand UDP PORTS.
– Open the App configuration menu and select “X-Plane parameters”
(2) Get the Machine’s IP Address and put it in “Simulator IP Address”.
(3) Get the “Port we receive on” and put in “Simulator Port”.
4. Press Done
5. RESTART THE APP and X-PLANE.
6. Start a flight: X-Plane does not send data to the device until there is an active flight.
Advice
DHCP is a network service that provides IP addresses to devices dynamically.
In the event that your access point or router has the DHCP service enabled (usually it is) you can avoid repeating the “setting the network addresses” section reserving a fixed IP address for the device in the DHCP service. If you are unsure how to do it consult a qualified technician.
Data added in X-Plane 12
Version 12 incorporates information about the helicopter’s Governor. Previous versions do not send this data and therefore the GOV OFF light always remains off.